If you had asked me a month ago to take a picture with an SLR I probably wouldn't have been able to work the automatic function let alone manage all the mysteries of the manual setting. I always knew things called 'shutter speed' and 'iso' existed but I didn't really know or understand what they were, HOWEVER all that has now changed... With the help of my photographer friend Ben I now know how to use my sister's Canon EOS 1000D so I though I'd share a few tips with all you budding photographers.
Before I start I just want to make clear that this is all pretty basic stuff for people who have no idea what an SLR is all about. I am still a beginner myself but I was given some excellent advice which I want to pass on to you guys. There really is no need to read this if you have a clue already about photography!
The most important thing to take into consideration when taking a photo is light. If there is too much light the picture will be over exposed and everything will appear too bright. If there is not enough light the photo will be under exposed and everything will appear dark and black.
The 3 main factors influencing light are shutter speed, aperture and iso.
Shutter Speed
This is how quickly the photo is taken. The higher the number (at the bottom of the fraction) i.e 1/800 the faster the photo is taken hence the less amount of light let into the camera. If the shutter speed is a low number i.e 1/5 the photo will take longer therefore letting more light in.
As a rule of thumb the shutter speed should never be lower than the lens length. For example I have a 18 - 55mm lens. If the lens is positioned on 18mm than the shutter speed should not be lower than 1/18 i.e. 1/5 would be too slow a shutter speed. If the lens is set to 55mm the shutter speed number needs to be set to 1/55 or higher i.e. 1/150.
On Canon cameras shutter speed is represented by the symbol Tv.
ISO
This is how sensitive the camera is to light. When film is used you can buy different sensitivities. For example is you are going on holiday where it's going to be nice and sunny you would probably buy a 200 iso film but if you were taking pictures in the winter time where its cloudy and not a lot of light is present you might buy a 800 iso film. The same thing applies to digital cameras. The iso setting can be changed according to how much light is present when the picture is taken.
The more light present the smaller the iso number and the less light available the higher the number. My camera goes as low as 100 which is only needed on an extremely bright day.
Aperture
This is the hole in which light travels through the camera, the larger the hole the more light that is let into the camera and vice versa. The aperture on a camera is controlled by the f stop; the lower the f stop number i.e. 3.5 the bigger the hole therefore more light is let in. The higher the f stop i.e. 11 the smaller the hole thus less light is let in.
Aperture is also involved in 'depth of field' which is how much of your photo is in focus. For example the higher the f stop the wider the depth of field therefore more of the picture will be in focus. If you are taking photos of a landscape where you want everything to be in focus, a high f stop number is needed.
You've probably seen a lot of photos in the blogging world where the person being photographed looks lovely in focus, with a blurry background behind them. This is done by having the f stop as low as possible. You focus the camera on the person hence the reason they are in focus and the background isn't.
On Canon cameras aperture is represent by the symbol Av.
Putting it all together
You are probably wondering how on earth do you manage all these different factors at once to come out with a photo with the perfect amount of light! Well fortunately there is a little scale on the SLR that tells you if the picture in under exposed (to the left), or over exposed (to the right). If there is the perfect amount of light the arrow on the scale will be directly in the middle. However, there is still a lot of trial and error involved.
When I take a photo the first thing I change is the iso. You will become quickly accustomed to knowing what iso to set the camera too depending on the light. My camera goes up to 1600 but much better models go to as high as 6400. At night time or in dark places you need 1600 if not higher, on a normal British day 200 or 400 should be appropriate and when it's crazy sunny 100 will suffice.
After the iso is set (you can always change it later) you can change the shutter speed or aperture. I set a lot of my photos to a low aperture as I like the blurry background effect, this also means that more light is being let into the camera. Therefore the last thing to change is the shutter speed until the light scale I mentioned above is in the middle for the perfect exposure.
I mentioned about that the shutter speed should never be lower than the lens length therefore if you need to make the shutter speed lower than the lens length to get the perfectly exposed photo you can either make the f stop (aperture) lower or make the iso higher. If you have to have an extremely low shutter speed number then you will need to use a tripod.
One thing I haven't mentioned is the flash and that's because I don't like using it. When the flash is used the lighting of the picture changes and the results can often be harsh and not very natural. I try not to use the flash and instead increase the iso, however a high iso such as 1600 can make a photo look grainy so it's really a preference.
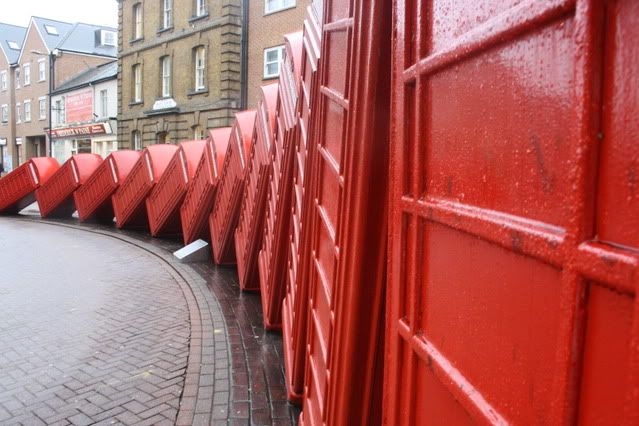
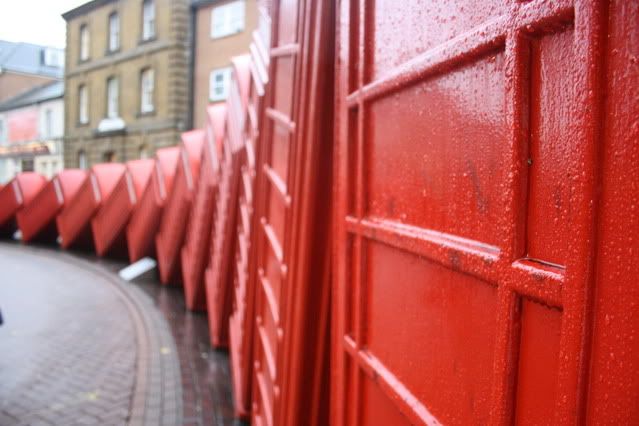
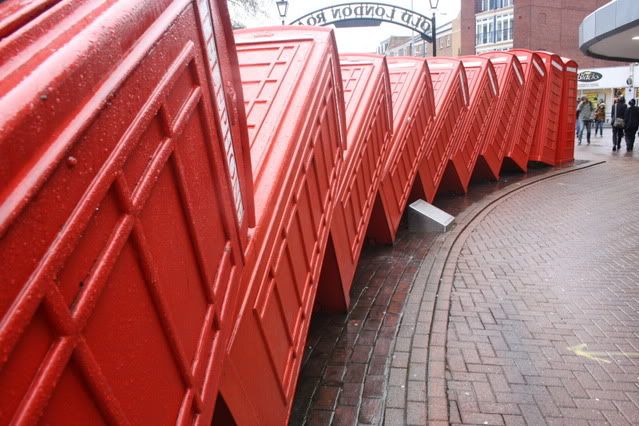
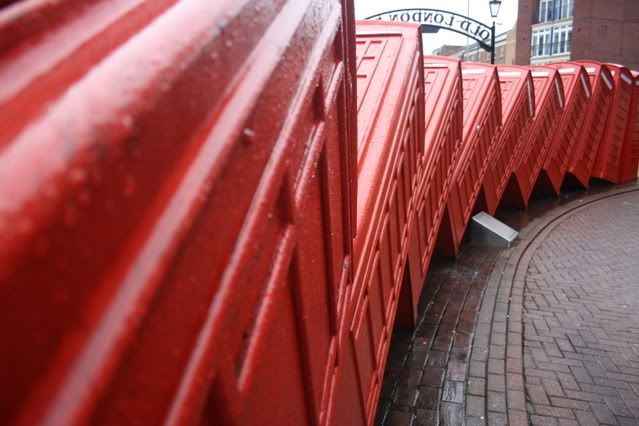
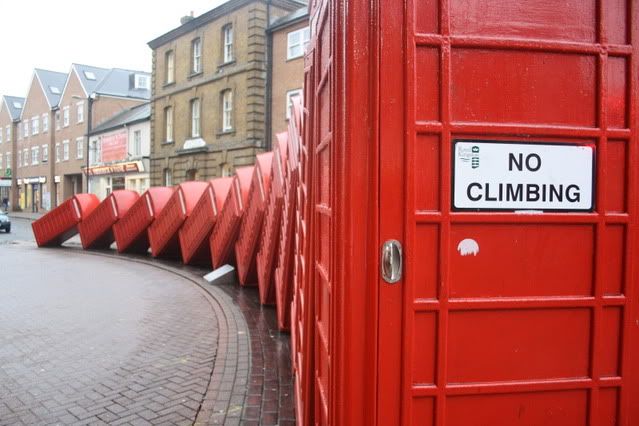
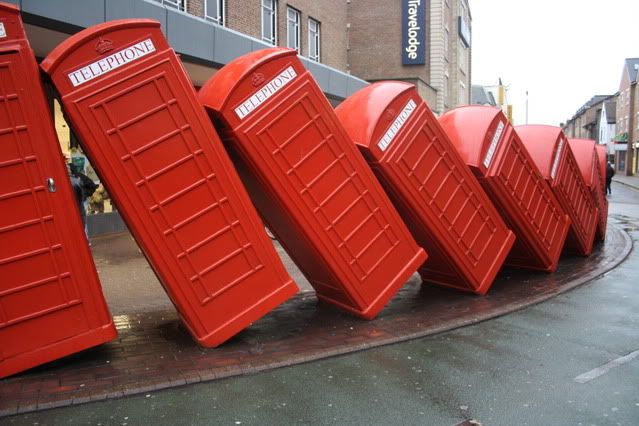
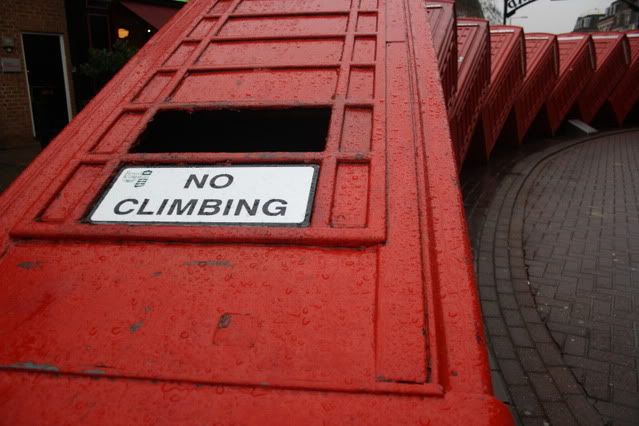
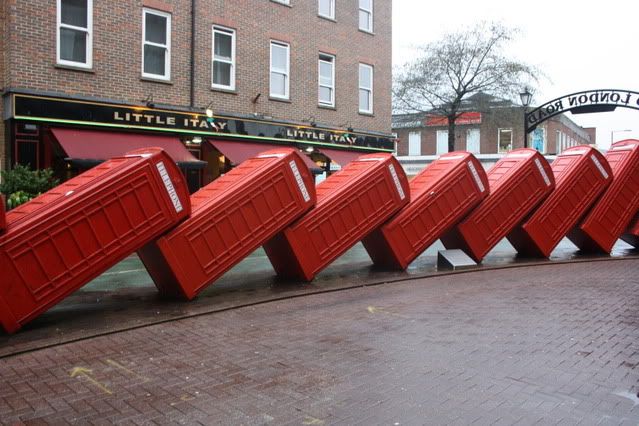
So here are a couple of examples. I went to Kingston yesterday to check out Primark (it was rubbish) but I did enjoy a quick photo shot at this sculpture by David Mach called Out of Order. These tumbling telephone boxes are so iconic and many a drunken night have photos been snapped here!
As you can see with these two, the top picture is much more in focus than the bottom. For the first picture I set the camera to an aperture of 8.0 with the shutter speed at 1/20. For the second picture the aperture was set to 3.5 which meant the shutter speed could be increased to 1/40. The same concept applies to the two photos seen below. When the aperture is low, the shutter speed is higher when compared to a high aperture setting. Because it was a pretty miserable day the iso was set at 400, sometimes 800.
I really like the effect when a picture is blurry in places, I think it makes the whole image a little more interesting and also makes the focal point more obvious.
Here are a couple of other pictures I took.
So I have, the Canon EOS 1000D which has just been upgrade with the 1100D. I really want the 550D because it has a higher mega pixel count, makes videos and is also a little faster but at over £500 I'll be waiting a long time.
I'm going to stop here before I ramble on but I really hope this has helped those of you who don't know much about photography. I might do another photography related post once I've learnt a few other techniques such as shooting in RAW and using different lenses. If you have any question just send me an email and I'll do my best do answer them for you.
Get clicking x

believe or not I really needed someone to explain me all that stuff!
ReplyDeletehttp://stylecoffee.blogspot.com/
This is so helpful!
ReplyDeletex
great post!!
ReplyDeleteThis is really helpful. I bought myself a Lumix camera for Christmas which while not being an SLR has a lot of manual settings so hopefully now I can figure how to use some of them! Your telephone box photos are great. x
ReplyDeleteNice post! I'm clueless when it comes to all that!
ReplyDeleteX
Wow, thanks ill try this!
ReplyDelete:)
http://stylishoverflows.blogspot.com/
Thank you for the info. I'm still getting used to mine but think I'm getting better.
ReplyDeleteAny more tips are very welcome.
X x x
Wow I'm definitely bookmarking this for when I get my DSLR and I might even explore my point and shoot a little more.
ReplyDeletegreat post!
ReplyDeletedefinitely visiting this place!
What a post! Isn't it amazing that the mechanics of digital cameras are so very similar to the mechanical ones?
ReplyDeletegreat post :)
ReplyDeleteim much more of a nikon fan myself,
but apparently the 1000d is pretty good!
Rosie xo
So helpful. I wish I'd known this when I started!
ReplyDeleteamazing pictures en a good post. Very helpful. xxx
ReplyDeleteLOL. I like how it says "No climbing" because I was totally thinking about people climbing it. It took me a long time to understand about shutter and aperture and stuff and i'm still not good with it.
ReplyDeleteloove these photos! i like how you broke down each part of what goes into searching for a camera, because a good camera doesn't just have one thing it has everything!
ReplyDeletex http://madelineweber.blogspot.com/
Oh what a great post! Thank you. I'm going to bookmark it and come back and read it when I'm not knackered - I might get the full benefit of it then!
ReplyDeleteBrilliant tips, I know very little about SLRs, but when I finally get around to buying one I'll definitely come back to this post xxx
ReplyDeleteGreat post :)
ReplyDeleteThank you for the lovely comment on my blog by the way <3
Will eventually write another post soon, need to motivate myself a bit more to do it, especially at this busy time at my work (I work at Clinton Cards, so this week has been pretty hectic).
Anyway, all I was trying to say is thank you for the comment & I love your blog :)
Rebecca xo
thank you for your sweet comments :)
ReplyDeleteaw, I want a SLR camera too! huhu
check out my newest post if you like to
sweets from Bali
Dias
awesome shoot :)
ReplyDeletehttp://dewliciouz.blogspot.com
I'm sure this is so helpful to lots of people!
ReplyDeleteThe pictures you took are amazing :D.
xoxo
i love your blog baby :) and im following you
ReplyDeletefollow please my blog too
a lot of kisses from poland!
Love the telephone boxes. Unusual, but very cool.
ReplyDeleteI read so many guides when I first got my slr, and I think yours is great. You've made it so simple and easy to follow, but you've got all the important stuff in. I usually vary the aperture in low lights, but after reading this I will start playing around with the iso too. Thanks for such a good guide!
ReplyDeletethis is a great post, you explain everything so well.
ReplyDeletegreat tutorial post! i wish i get an slr soon! :(
ReplyDeletexx
heyrocketgirl
great advice.
ReplyDeletelove it, i feel like i understand now! xx
ReplyDeleteJust to let you know, Canon certainly isn't the only one to offer an ISO setting of 100.
ReplyDeleteI've used a Panasonic, Olympus, and Nikon and all of them have it. I think most cameras do actually!
xx
The falling down phone boxes!!! Oh how I miss them. I'm from down the road in Ealing, and had many a meal in the Garfunkels that has now been replaced my Little Italy. God knows why, Garfunkels was my favourite childhood restaurant!
ReplyDeleteSo nice to see them on here!!
this is an interesting read! thanks for sharing
ReplyDeleteThank you! Great post!
ReplyDelete